
I decided to take a few holiday tasks off of my plate this year to ease the stress of the holiday season.
One of those tasks was baking! However, I quickly realized I wouldn't have my typical tins of cookies to gift to friends and neighbors.
If you know me, you know I love fragrance-free aromas to scent my home.
I started brainstorming and quickly remembered one of my fall favorites, the simmer pot.
I started to think about simmer pots I had created in the past and browsed various gift ideas. That is when I decided, I could absolutely give the gift of a warm
and cozy aroma for friends and family without gifting scented soaps, oils, or diffusers.
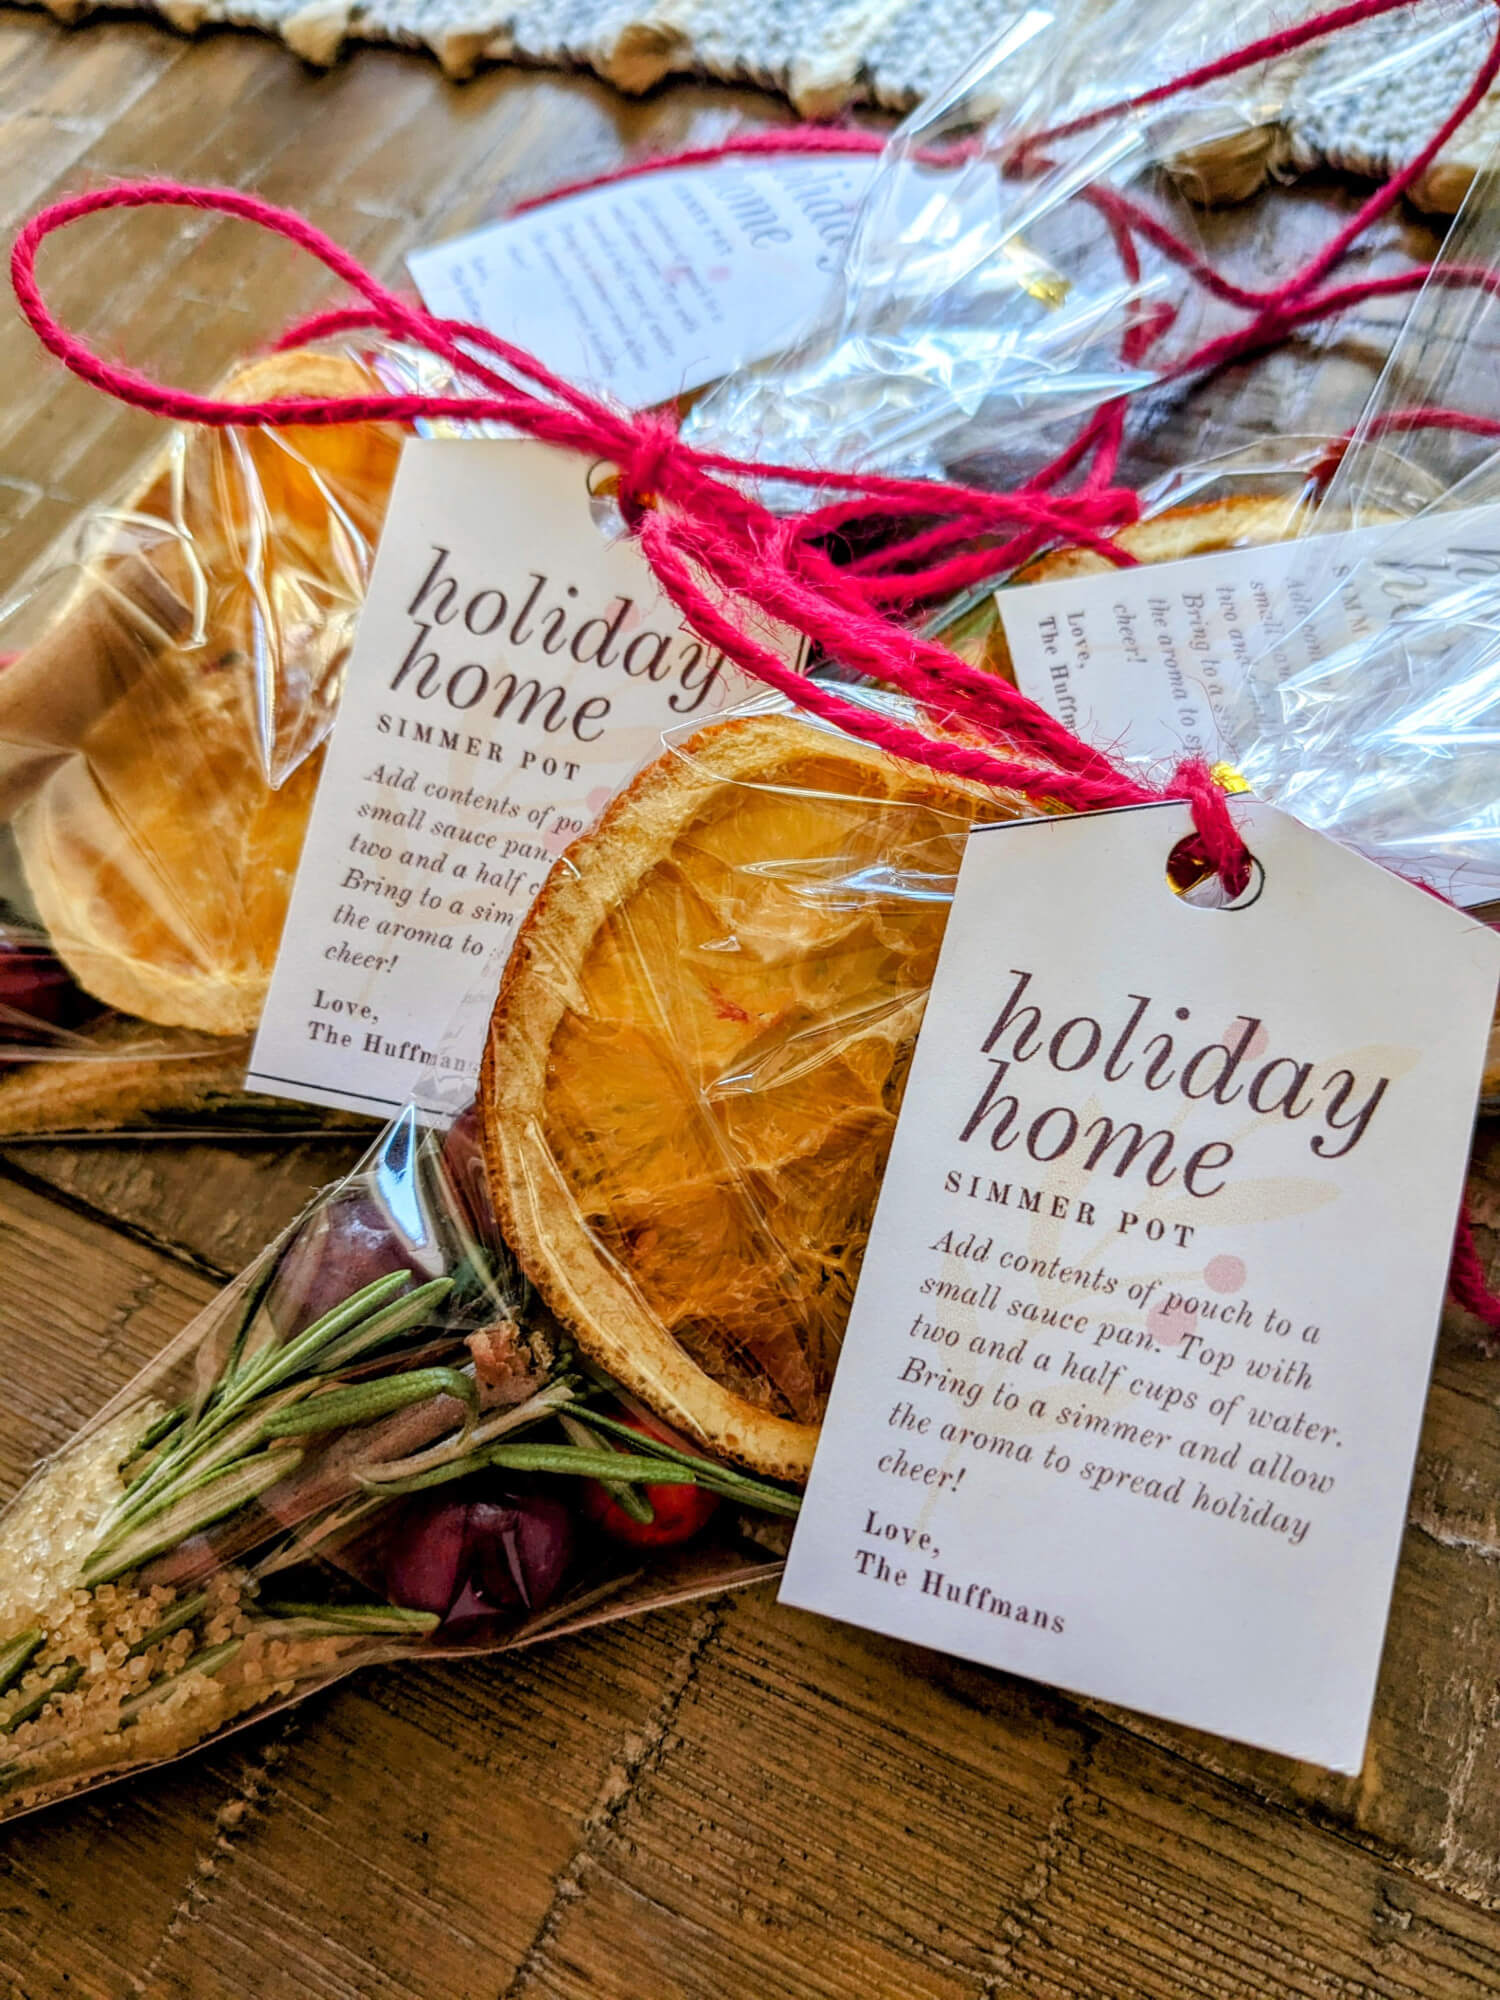
I titled this gift a " Holiday Home" simmer pot. You can find the printable gift tag below the recipe.
Holiday Home Simmer Pot
You will need:
Sugar in the Raw or White Sugar
Rosemary Sprigs
Cloves or Mulling Spices
1-2 Oranges Thinly sliced
Cranberries
Cinnamon Sticks
Three of your favorite festive essential oils ( I used Christmas Spirit, Stress Away, and Orange from Young Living)
1. Take your thinly sliced oranges and place them on a baking sheet lined with parchment paper. Drop your favorite spiced oil onto each slice. I used Christmas Spirit.
Bake the slices at 250 degrees for five hours or less ( watch for browning). I turned mine at the 2.5 hour mark. Allow to cool completely.
2. Place 1-2 cups of sugar in a bowl. Add 10 drops of Orange oil and 10 drops of Stress Away oil to the sugar and mix.
( I tried this with vanilla extract and it did not go well)
3. In a clear bag, drop your sprig of rosemary and a cinnamon stick. Add 1-2 tablespoons of your sugar mixture. Top with a pinch of cloves and a few cranberries.
Before twisting the bag close, add your dried orange slice.
4. Once you have add all of your items, tie a ribbon at the top of the bag and attach the gift tag below. Your recipient will add 2 1/2/ cups of water to a pot, add the contents of the pouch and simmer.
Your friends and family are sure to enjoy this comforting aroma as they prepare for the holidays!
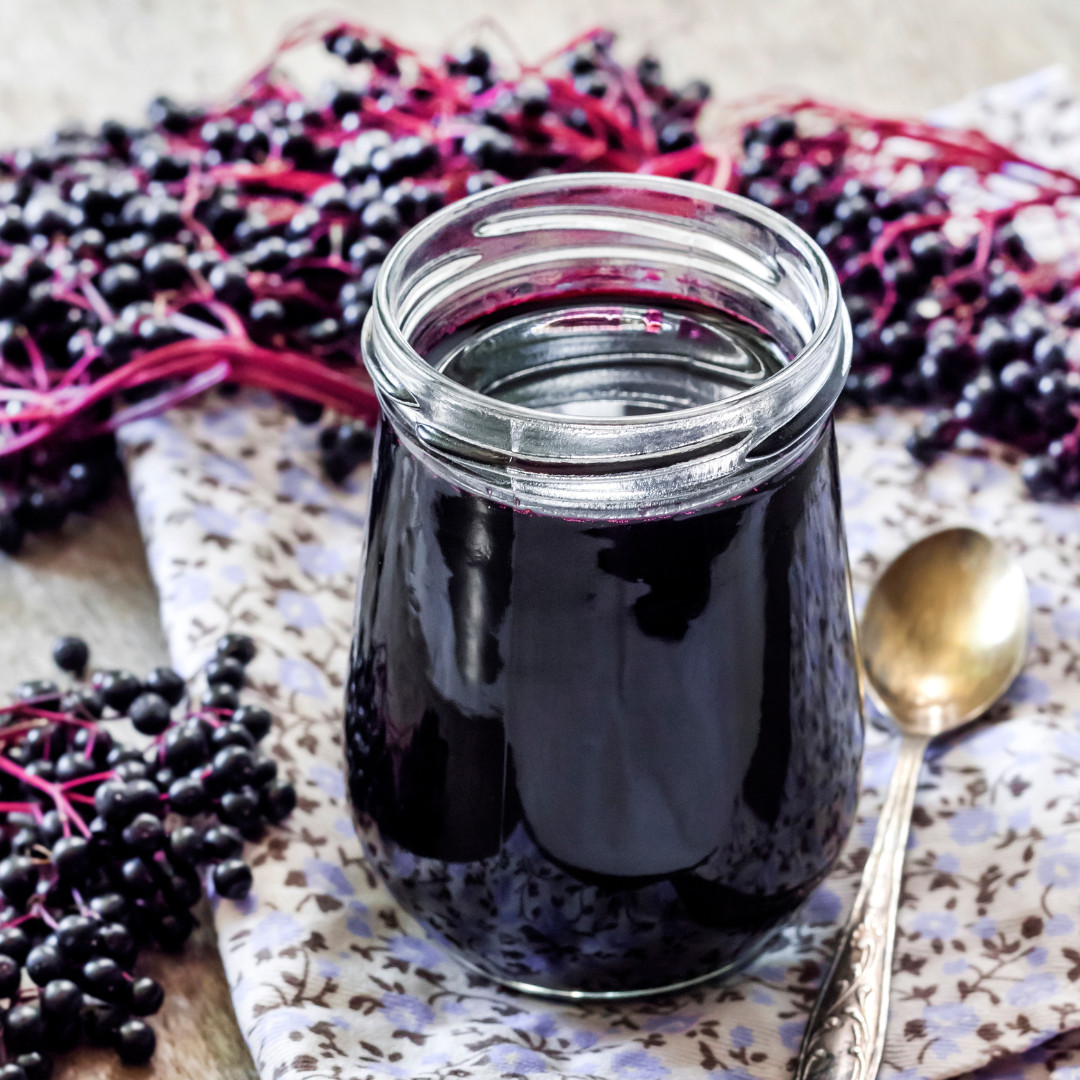
It is back to school season which means we are doing all the things to keep our household healthy! One of the items we tend to grab in the fall and winter is elderberry syrup. You can purchase this or make your own. Making elderberry syrup is actually much simpler that you would think. You can even use your Instant Pot!
I have hit some roadblocks with elderberry syrup. The first one is, my kids and I do not prefer the taste. The second one is, I don't always have time to make it. The third one is, I am not always near somewhere where I can just "Go grab a jar." This has us purchasing our elderberry supplement in gummy form these days!
Today, I thought I would share the DIY recipe that we have used in the past and also share some information about our new favorite elderberry gummies (it is actually more than an elderberry gummy). Let's get started!
DIY Elderberry Syrup
I love a good DIY. Any DIYer knows that they are typically great money savers AND the ingredients are much simpler! We made this recipe a few years ago. Essential oils take this recipe up a notch. If giving to your kids, definitely taste test before as some of the oils can add a "spicy" taste to the mix. Take a peek below!

Directions:
Bring the berries, water, ginger, cinnamon, and clove to a boil.
Cover and simmer or 45 minutes.
Once warm, mash and strain the berries from the liquid.
In a small bowl, combine the honey and essential oils.
Once the berry mixture begins to cool, slowly stir in your honey mixture.
Adults take one tablespoon daily.
Children take 1 teaspoon daily.
You can grab the elderberries here.
Grab your Thieves and Lemon Vitality Oils here.
The BUY
Now, if the recipe above doesn't appeal to you, check out these Immugummies!
Not only do they have elderberry flower in them, they also contain beta-glucans. You can't beat the ingredients or the fact that there is no added sugar or dyes.

Here is some information I pulled from the LIfestepsApp that will fill you in on the details of this gem.
Support your family's wellness with our the Immugummies daily supplement! These delicious elderflower- and lime-flavored gummies are more than just a sweet treat. They naturally support optimal immune function, immune health, and upper respiratory tract health.
Packed with power, flavor, and pure algal beta-glucans, these gummies are a daily must-have for a healthy immune system.
ELDERBERRY & ELDERFLOWER
Elderberry and elderflower are two different parts of the same medicinal shrub, and both can be used for their health benefits! While similar, they each have distinct properties that can be used for immune and respiratory health.
Elderberries have been utilized in traditional folk medicine for thousands of years. In European folklore, elderberry consumption was associated with increased longevity and vigor! They are a great source of antioxidants, dietary fiber and vitamins, and are a wonderful way to provide immune support for the body.
Elderflowers are the flowers of the same plant that bloom before the berries form. They have a slight sweet, floral taste, making them a popular choice for teas and cordials. Elderflowers have been shown to have up to two times higher antioxidant activity than the berries due to a higher phenolic content, and they are great for supporting the respiratory system.
KEY INGREDIENTS
1,3 beta-glucans (from Euglena gracilis algae): Beta- glucans support immune health, immune function, and upper respiratory tract health. They're sourced through a sustainable indoor fermentation process to reduce waste and prevent harm to marine ecosystems.
Elderberry fruit juice concentrate: This ingredient contains antioxidants that combat free radicals and support the immune system.
Elderflower natural flavor: Flowers from the elder tree have been used for centuries to support a healthy respiratory system.
Lime essential oil: This zesty oil is a good source of d-limonene, a terpene that has antioxidant properties
What do they taste like?
These gummies are a combination of fruity and floral. You can definitely taste the Lime oil as well.
I was skeptical about whether the kids would like them but they enjoy them. In fact, they will even remind me to give them one if I forget.
So what do you think? Are you a DIYer or a BUYer when it comes to your elderberry supplement?

Whether you are a new parent or your newest addition is throwing you for a loop when it comes to feeding, the lead up to introducing those first solid foods can cause your head to spin and your stress-levels to rise. You may find yourself reading blogs like this one, watching REEL after REEL to see how other families are doing things, doing internet searches such as "Introducing Solids to my Baby" and second guessing the choices you make as the time to start solids approaches.
TAKE A DEEP BREATH! Also, distance yourself from social media where you will find conflicting approaches and opinions when it comes to what and how to feed your child. Hone in to YOUR child and their behaviors. You will know when they are ready.
In the meantime, here are three simple steps you can take to help with a smooth transition to mealtime before the introduction of solids begins.

Pick the high chair/ booster seat that your child will use!
Look for a seat that provides all around support and a place that their feet can rest to help stabilize them. You will want to get them used to sitting in the seat and enjoying themself. You do not want to introduce two new things at once. Start with small increments of small play tasks using this seat and gradually increase it. I always say that 15 minutes is a good amount of time! Start with 5 minutes and work your way up. This may be easy peasy for some little ones and trickier for others. It is better to know before you begin to introduce food which category your child fits in.
Include your baby in mealtime before they begin their introduction to solids!
Pull that booster/highchair right up to the table with the rest of the family. Place a bottle or empty cup in front of them and let them do their thing while you eat. You can also provide them with handheld toys meant for oral exploration. Including them in mealtime at the table will pique their interest in what you are doing and entice them to want to be apart of the meal. Your baby may even start reaching for items on your plate. This is a good indicator that they are ready to go!
Breast or bottle feed prior to introducing the new food!
You do not want to bring a hungry baby to the table. About an hour before you present them with their solid food, feed them. When they are placed in their seat, you will have a content child that is ready to explore. If need be, after trialing the new food, you can provide milk once more so they can associate this mealtime with a full belly. We want them satisfied and happy!
Hopefully, these three tips ease you and your little one into the transition of starting their new feeding stage. Remember, you want to keep things simple and stress-free. The gradual introductions mentioned above, will add to your confidence going into that first introduction.
If you feel like you need some professional guidance and strategies, I serve families in the North Raleigh, Wake Forest, Rolesville, and Youngsville areas of North Carolina and I am happy to help! Visit me over at Balanced Beginnings Pediatric Therapy
A couple of weeks ago, I had an aha moment after several days of feeling overwhelmed.
I do not have to do it all!
There is SO MUCH that goes into running the household and I live with three other humans who are
capable of helping me BUT, I never ask. We have tried the chore charts before but I decided to go a different direction with things this time. I realized that because I am doing so much work behind the scenes, the rest of the family isn't aware of all of the tasks that go into our day to day routine. Things like keeping the house clean, getting dinner on the table, managing schedules, planning get togethers, or making sure things are in order for our fur kiddos.
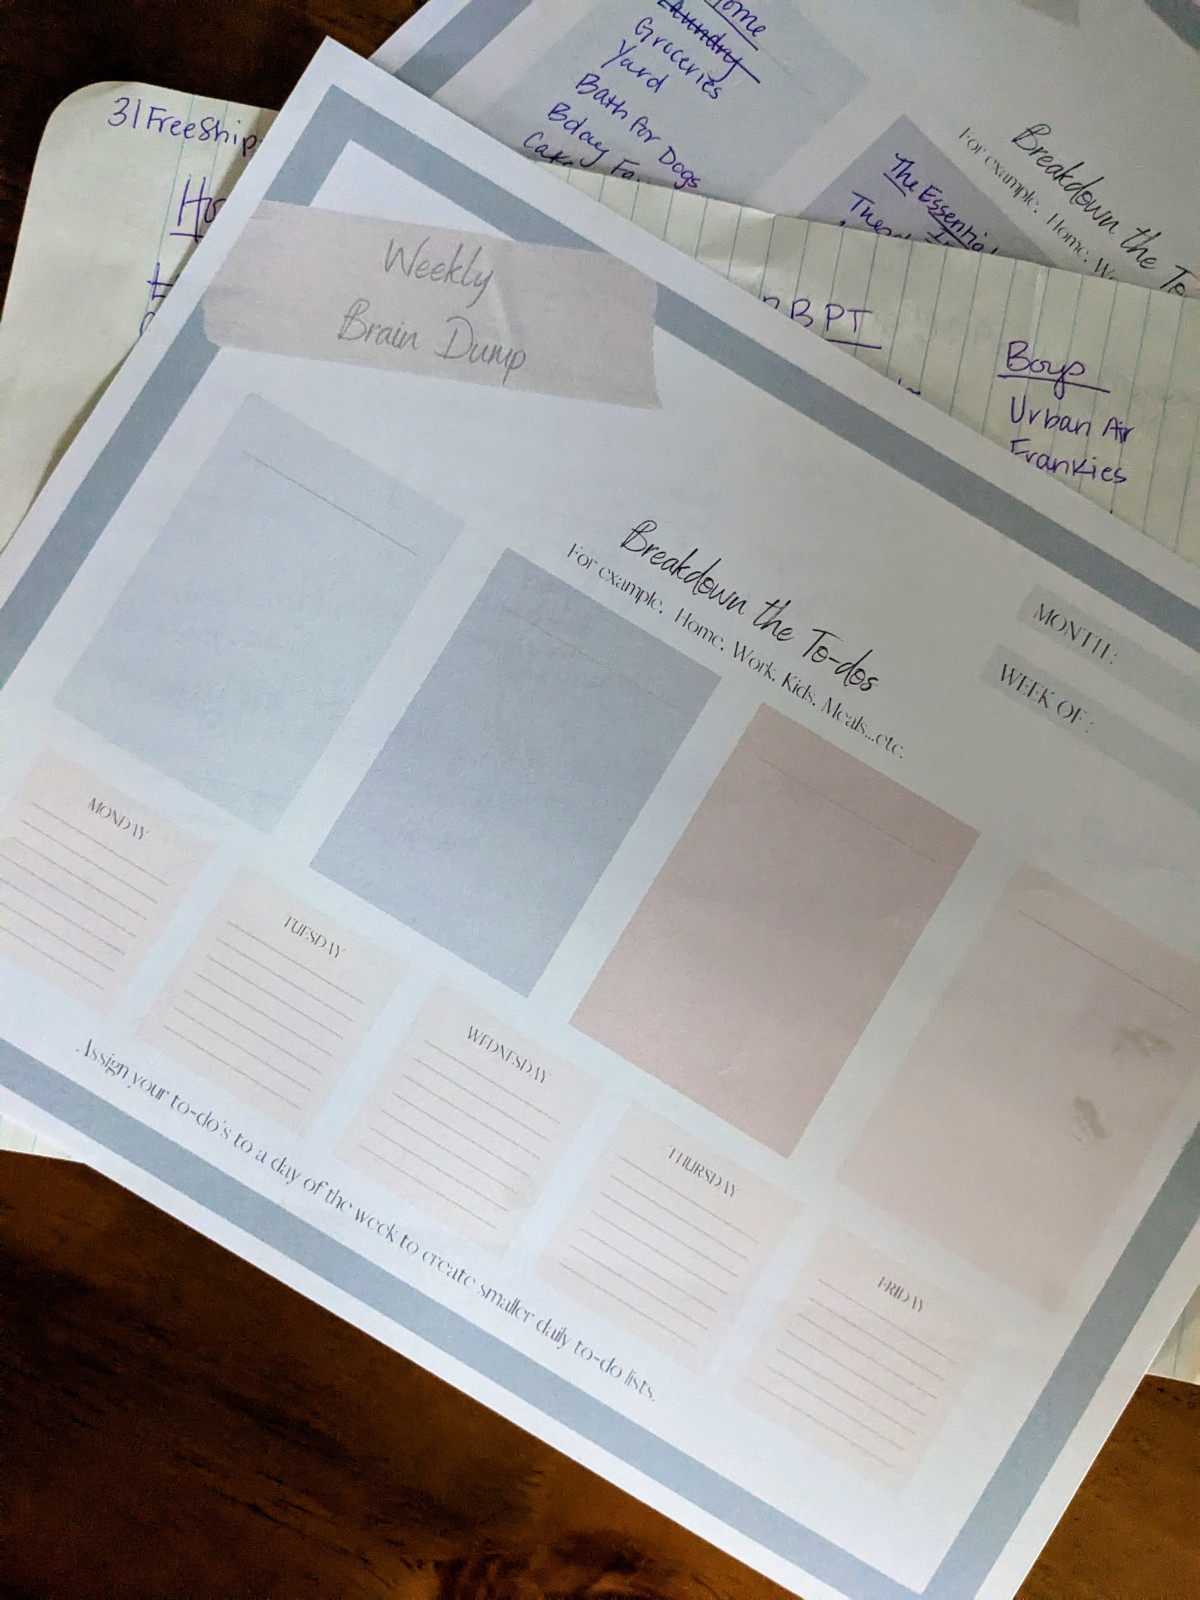
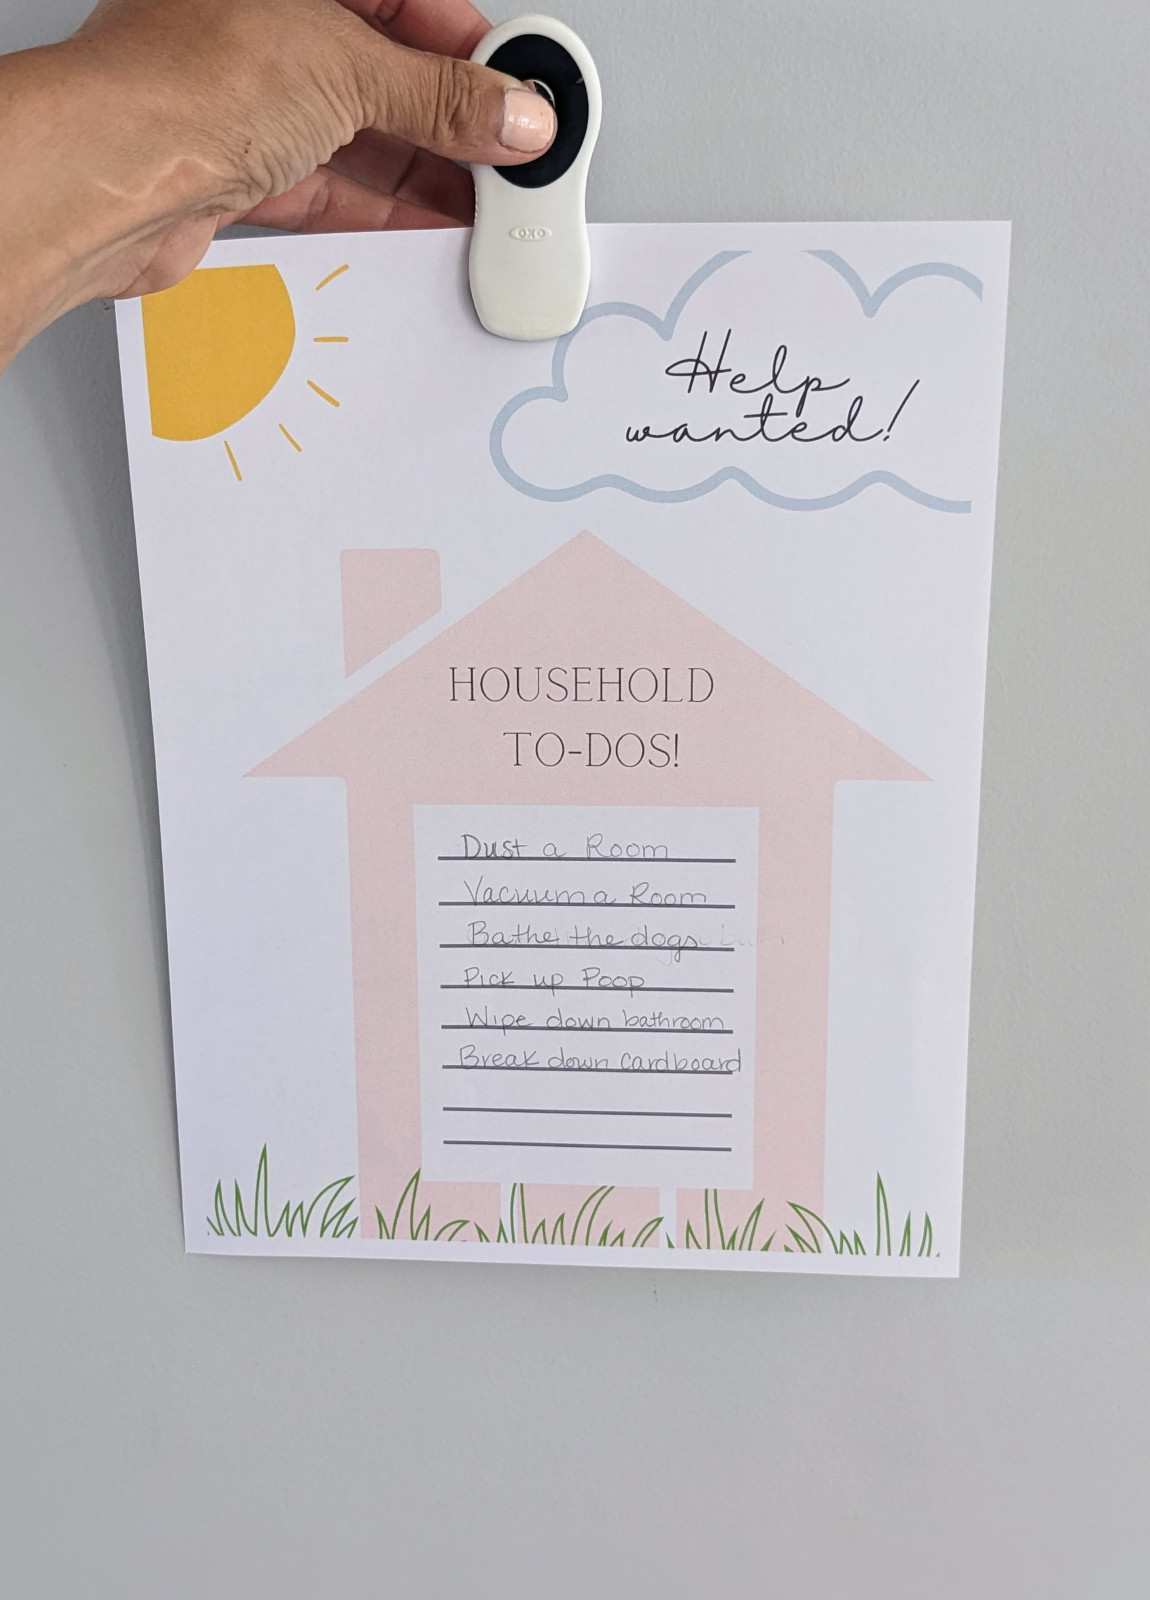
Last week, on Friday afternoon, I created a quick print out to keep on the fridge. It read, "Help Wanted!"
On this printable, I listed all of the tasks that needed to happen for the weekend. This included vacuuming, dusting, emptying trash cans, bathing the dogs, picking up the dog poop, etc. I simply asked that everyone do 1-2 things on the list before they had their fun for the day. There was no pushback whatsoever!
Two things happened!
One, my overwhelming list of things to do became shorter. I could focus on planning a birthday and Father's Day because I had help with the household tasks.
Two, it gave my family insight and a gentle reminder of all the things that need to be done to keep the house running smoothly and in order, just like we all like it.
Here is your reminder to ask for help!
it takes the overwhelm off of everyone when the family is working together.
Click the link below for your "Help Wanted" printable. If you find it helpful, I would love to hear form you.
Enjoy!

You know I love a good sensory activity!
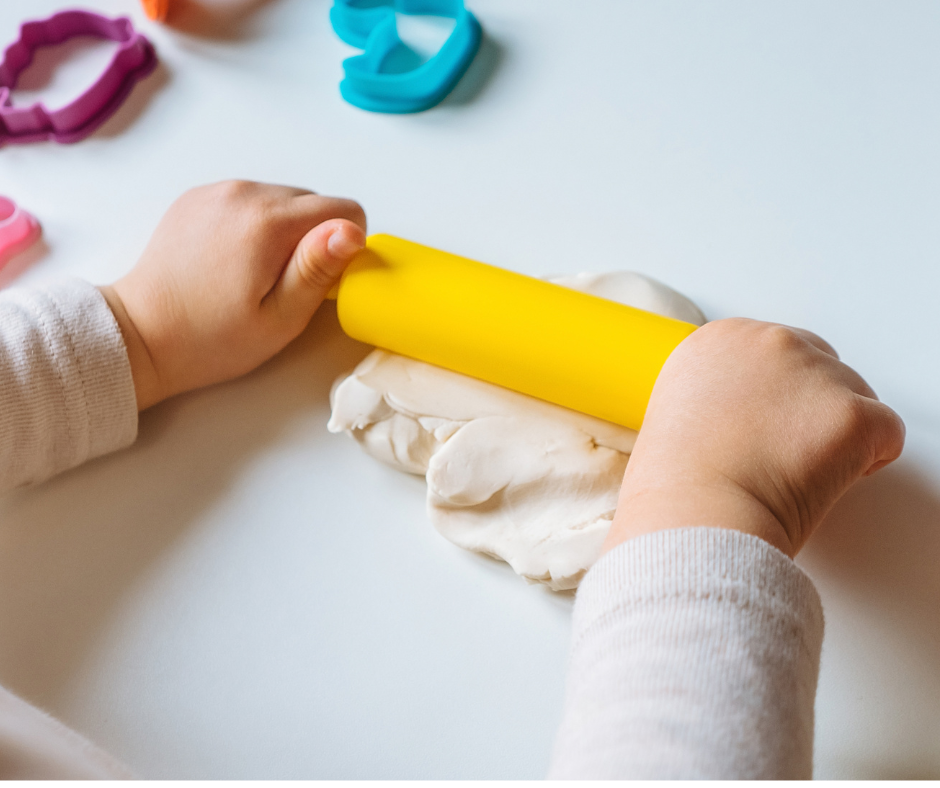
As I planned my "Let's Eat" small group for the week, I remembered how much I enjoy incorporating play dough into sensory play. Then it dawned on me. As a way to lead into snack time for a therapy session, I will create aromas for the play dough using essential oils and food flavoring oils.
The recipe I used can be found below, along with various ways we used the playdough prior to diving into
our meal time.

The recipe for the playdough is from kidsactivities.com
2 Cups of Flour
2 Tbsp of Oil, I used fractionated coconut oil
1/2 Cup of Salt
2 Tbsp Cream of Tartar
1 1/2 Cup Boiling Water
Gel Food Coloring ( You can use regular food coloring but the color will not be as vibrant)
You will need citrus essential oils and/or the LorAnnfood oils of your choice.
To create the playdough, first put 1/5 cups of water on the stove to boil. While you are waiting, add the flour, oil, salt, and Cream of Tartar to a bowl. Mix well. Once the water is boiling, power the water over your flour mixture and begin to stir. It will be hot so please be care. Continue to manipulate the mixture until it is the consistency of dough. Set aside and allow to cool.
Once cool, separate into four equal parts to create four balls of dough. Create a divot into each ball with your thumb. Add several drops of desired dye to each ball of dough. Manipulate the dough until the color is well mixed.
Next, create the balls of dough and create a divot in each once more. Add 10-15 drops of your essential oil/food oils to the dough and knead until well mixed. You should be able to hold the dough to your nose and be able to identify the aroma.
Try to match your color with a corresponding aroma. For instance, Lemon was yellow dough, Orange was orange dough, Strawberry was red, and Green was apple.
Store each ball of dough separately in a small jar or individual bags.
How do you incorporate this into a feeding focused sensory activity?
Simple! You touch, smell, look, and manipulate that dough. Talk about what it smells like. Describe what you think it smells and tastes like. Provide the child with vocabulary so they can associate certain words with smells. All them to roll, cut, smash, explore the different color dough. Ask them what it reminds them of.
You can even help them create food with the dough! This activity will get them excited and get their senses excited to explore their upcoming meal or snack time.
It will be a huge hit for everyone!
Enjoy!